The silver bullet for attracting more readers

Media coverage can boost your visibility, helping you to attract more clients. Joanne Cleaver, a fellow member of the American Society of Journalists and Authors, suggests in her guest post that you expand your ideas of the topics on which you’d like to be quoted.

The silver bullet for attracting more readers

By Joanne Cleaver

If you know enough to write regularly about investing and financial planning, you know enough to be quoted. But how can you elevate your hand-built riser into a national platform?

The best way to gain expert status is to be quoted by journalists. Their responsibility is to present credible information in context. When your expertise adds clarity, insight and experience that brings an article to life, you will become a go-to source. That establishes you as an expert and builds your reputation .

That’s all well and good. But how do you get started? Here’s how to break the anonymity trap of not being quoted because you aren’t known, and not being known because you’re not being quoted.

First, sign up for HelpAReporterOut.com.

For $19 a month, HARO delivers to your inbox a daily list of requests from journalists looking for immediate sources for stories they are working on now. Simply reviewing the requests helps you detect what journalists need.

Your initial reaction will be to respond only to requests that seek financial experts. With 50 or more HARO requests daily, it’s only a matter of time before you find a request for precisely your technical and advisory expertise. And offering quotable, useable financial insight is a great way to win media mentions.

But you have more to offer than professional commentary. Your life experience—as a parent, a business owner, a volunteer—also is invaluable fodder. For example, you might respond to a reporter search for parents who have recently navigated the college application and financial aid process. Your pitch would pivot on your experience as a parent who’s better informed than most on financial topics, but you’d also be interviewed about your frustrations and feelings about financial aid.

Responding to a HARO request that appears tangential to your professional expertise does two things: it opens a relationship with the journalist, and it is a chance to showcase personal insight that rounds out your professional reputation and presents you as human, empathetic and approachable.

Both types of media mentions—professional and personal—build reputation and blog readership…as long as that silver bullet hits your target audience.

____________

A former daily newspaper deputy business editor, Joanne Cleaver helps professionals develop and deliver the right messages to the right audiences through media and communication training. Learn more at http://wilson-taylorassoc.com/media-training.

Tech tips for your educational webinar–Learn from my experience

Webinars can be a great way to educate clients and prospects. However, managing the technology can be a big hassle. I experienced that stress when I hosted a webinar, “How to Write Investment Commentary People Will Read,” in June 2014. I’m sharing what I learned so you don’t have to struggle as much as I did.

Step 1. Pick your technology

Providers vary in terms of costs and offerings. My virtual assistant researched a bunch of companies for me, but I found the list overwhelming. I started with a provider where I was grandfathered into a free plan. I later switched to another provider, GoToWebinar, for reasons I’ll describe below. Along the way, I decided that the following characteristics were important.

General characteristics

  • Good reviews/fan base
  • Reasonable price
  • Stability of the webinar so that participants would have a good experience

For webinar presenters and participants

  • Ability to dial in or use computer headset
  • Easy to use
  • Good technical support, in addition to good documentation
  • Usable on a mobile device (participants only)

For host (the organizer of the webinar)

  • The ability to host at least 50 people with ability to upgrade at the last minute if necessary
  • No long-term commitment
  • Registration to collect the names and emails of participants

For presenters, the ability to:

  • Have two or three people with full access to speak and see all of the following: the Q&A and/or chat boxes in addition to the slides, although, only one person would control the slides, even when the other is speaking
  • Share just a portion of the computer screen
  • Reduce echo on the call
  • Record and share as an .mp4 file without the need for conversion

Nice to have

  • Polling
  • Ability to mute phone lines of individual participants

You can customize my list of specific requirements to your needs. My list grew out of my frustration with my original provider. I’d taken a five-week class with a teacher who used the original provider successfully. The experience was painless from my perspective as a student. That experience, plus the fact that I didn’t need to pay for the product, was appealing.

Step 2. Practice to uncover problems

I started practicing on my original provider almost two months before the date of my webinar. I gave up after about four weeks. The product had many attractive features. Ultimately what drove me away was limited documentation and the lack of timely customer support. The firm offered support via email. Customer support was good about replying within 24 hours or less. However, I realized I couldn’t provide a professional experience to my participants without better support for myself and for any participants who might experience problems logging in. I shifted to GoToWebinar in early June. I also felt good about GoToWebinar because it’s a product of Citrix, which would be reassuring to my viewers working for conservative financial firms.

What kind of practice sessions do I recommend? I presented, sent invitations, and logged in as a participant from another computer who sent questions electronically to the presenter, and recorded and downloaded the recorded files. I also experimented with having two people logged in as presenters because I knew that would be part of my presentation strategy.

After I switched to GoToWebinar, I started practicing all over again. There were fewer similarities than I expected between my original provider and GoToWebinar.

Step 3. Work with customer support

GoToWebinar’s documentation is much more robust than that of my original provider. Also, its live training webinar was helpful. However, I often couldn’t find an answer to questions that I typed in plain English into the product’s “Find an Answer” page.

I developed a two-pronged approach to overcoming challenges on GoToWebinar that I couldn’t answer with an online search. This strategy may work for you with your provider.

  1. Send the question via their online contact form. I quickly learned to ask them to copy-paste my original question into their replies. Otherwise, important details were lost.
  2. Use the phone for things that flummoxed me. I tried to rely on email, but the phone calls saved my sanity, as I describe below.

Step 4. Check how long it takes your screen to display on your participants’ screens and get help if it’s too long

I had a meltdown the day I realized there was sometimes a significant delay between when the slides appeared on my screen and when they appeared on the viewers’ screens. Thirty to 40 seconds may not sound like much. However, in a slide-heavy presentation it feels like an eternity. I got on the phone with customer support at Citrix, which is the company behind GoToWebinar. They explored various reasons for the lag. Was my software outdated? Was slide animation or the load on my computer slowing things down. Eventually, they ran a special “wizard” to optimize my connection to GoToWebinar by routing me through a specific port—or something like that. They also ran diagnostics. One of these phone calls, which was combined with customer support accessing my computer remotely, ran three hours—yes, three hours—long.

GoToWebinar customer support’s research suggested that my connection problems were due to Verizon, my Internet provider. This is where the story falls into a “he said, she said” scenario. GoToWebinar said that Verizon should route me differently. They pointed me to websites on two different days showing problems with Verizon’s connections: http://internetpulse.net/ and http://downdetector.com/status/verizon-communications.

Verizon said “the Internet” was to blame.Verizon Help discusses 4th hop 
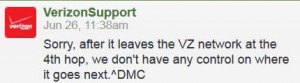
Once my signal—or whatever you call it—gets more than four hops away from my computer, it’s beyond Verizon’s control, according to their Twitter help folks. By the way, my actual connection speed was great when it worked. Both Verizon and GoToWebinar tested it.

The bottom line? I was on my own, aside from GoToWebinar’s fine-tuning my connection.

Caution: All customer support reps are not created equal. When you deal with customer support, be aware that there are different levels of experience and expertise. One of my first reps re-booted my computer without asking my permission first. Yikes! However, he got me promoted to dealing with Level 2 support, which means more experienced reps. However, even those Level 2 reps didn’t always agree on strategy. Sometimes they took steps that undid progress I’d made earlier. For example, one rep reinstalled software without telling me that reinstallation would undo my optimized connection and some other customizations I’d made. I’m not a technical person, so I didn’t know to ask about things like that.

On balance, however, I was happy with the technical support staff. They were patient, friendly, and helpful. On the day of my webinar, the rep who helped me with my connection problems gave me her direct email address. That proved helpful when the software booted me out—and wouldn’t let me back into—GoToWebinar after I logged in for my live presentation to the folks who were paying to attend my webinar. She called me right away and got me reconnected. Luckily, I’m a cautious person, so I was logging in more than an hour prior to the webinar.

Step 5. Don’t go it alone on your “live” webinar presentation

All of the whiz-bang technology can be a bit overwhelming when you’re presenting your webinar—especially if you or your attendees have technical problems or you don’t enjoy multi-tasking. I’ve watched webinars where presenters struggled. That’s why I enlisted two assistants. Lorena was my “producer.” She responded to attendees’ technical questions, told participants how to use the features of GoToWebinar in a brief introduction at the beginning of my live presentation, and loaded the poll questions at the right spots in my presentation. (By the way, Lorena may be available to help you with your webinars for an hourly fee.) Jen, a skilled presenter who’s knowledgeable about my webinar topic, was my facilitator. She introduced me and facilitated questions. The flow of questions into a webinar’s question box can overwhelm presenters who lack help, as I’ve noticed many times.

I rehearsed with Jen and Lorena prior to the live presentation. That helped us uncover some potential sticking points.

Having two helpers was great for my peace of mind. It also helped the flow of the webinar.

Step 6. Advise your attendees to make the most of their technology

Your best efforts at delivering a great webinar experience can fail if your attendees’ technology fails to cooperate. A viewer on an overloaded computer or a sluggish Internet experience will suffer. Ask them to test their technology in advance. Although they’re unlikely to take the time to run tests, you’ll benefit if they do. I like that GoToWebinar provides a link for attendees to test their technology in advance. Also, suggest to your viewers that they use a hardwired Internet connection and close open applications on their computers that they’re not using.

Step 7. Have a strategy for dealing with problems

My biggest concern was that the Internet would cause my slides to update very slowly on my viewers’ screens. That’s why I added Step 6 to my process.

I also

  • Provided a handout viewers could download to follow along. I sent this link ahead of time. I also asked my producer to urge them to print the handout while they’re waiting for the call to start. A clickable link to the handout appeared at the start of the webinar.
  • Gave my producer something to say to people who experienced lag time: “We’re so sorry. It’s an Internet connection problem that’s beyond our control. Can you follow along using the handout at…?”
  • Planned to advance my slides sooner rather than later.

I thought about asking my producer to say at the beginning, “Slides may sometimes be slow to appear on your computer screen for reasons beyond Susan’s control. She appreciates your understanding.” However, Lorena talked me out of that, saying that I would make people expect a bad experience. I got lucky. There were no major technical mishaps.

Step 8. Accept that your presentation will not be perfect

If you don’t use webinar technology regularly, things may go wrong. I had some small glitches in my live presentation. I hope my attendees were able to overlook them. Meanwhile, I’m sharing the lessons of my webinar experience so you and I may make fewer mistakes in future presentations.

Will I run another webinar?

“Never again” is what I said as I closed down my webinar session. However, I might reconsider. I think a presentation with fewer slides, making slide lag time less important, would be less stressful.

Would I use GoToWebinar again? Probably not. Their customer support was helpful. But two things bothered me.

First, there’s no easy way to convert the GoToWebinar’s video recordings to the popular mp4 format. I wanted the mp4 format to make viewing easy for Mac users as well as PC users.I tried a bunch of free conversion programs, but all of them had problems. It seemed as if long recordings were particularly difficult to convert with successful syncing of slides and sound.

Second, I was disturbed by my GoToWebinar control panel appearing momentarily onscreen in the recording of my live webinar. When I asked what went wrong, they eventually gave me a disappointing response: “The development team has determined what caused the control panel to appear during the presentation/recording and this will be resolved in GoToMeeting 6.4. The estimated release of GoToMeeting 6.4 is around the end of Q3.” Yikes!

How to market your self-published book: Lessons from my experience

Your self-published book won’t sell itself. In my opinion, writing and publishing your book is only half the battle. It’s equally important to inform people about your book and its benefits for them. I used nine techniques to promote my book, Financial Blogging: How to Write Powerful Posts That Attract Clients.

1. Plan ahead

I started planning my book’s marketing campaign when I thought my book’s publication was a few months in the future. In fact, due to glitches, my book was published more than a year later. The extra time helped me to prepare better, although I probably could have limped through my book launch with a shorter preparatory period.

One of the best things I did for my book marketing was signing up for my friend Sandy Beckwith’s book PR class, “Book Marketing 101 for Self Published Authors.” (Unfortunately, it appears that she no longer offers the class.)

Sandy’s class yielded the following written pieces:

  • Analysis of my book’s audience
  • Press release announcing my book’s publication
  • Press release in the form of a tip sheet
  • List of potential hosts and topics for a virtual book tour
  • Action plan for PR

By the end of the class, I had a roadmap for marketing my book.

By the way, if you prefer books or newsletters to classes, check out Sandy’s Build Book Buzz Publicity Forms & Templates and her free Build Book Buzz e-newsletter.

2. Solicit and highlight recommendations

Testimonials help to sell books. People are more likely to buy books recommended by people whom they trust. As soon as I had a close-to-final version of my text, I asked people for feedback on my manuscript. I also requested testimonials for use in my marketing, but only if they felt comfortable endorsing the book. I was delighted by the generosity of the responses I received.

Testimonials don’t help if no one reads them. By my publication date, I’d shared them in the following places:

  • Inside my book, where a page of testimonials follows my title page
  • On the book’s cover and back page
  • On a book testimonials page on my website that I have since moved to the bottom of the Financial Blogging book page on my website
  • In promotional emails

3. Use email

I relied heavily on my e-newsletters to publicize my book. After all, the folks who volunteered to receive emails from me were likely to make up a high percentage of my book’s first buyers.

Here are some of the steps I’ve taken since starting my book:

  • Mentioning my forthcoming book in my monthly e-newsletter and Weekly Tips
  • Creating a new newsletter list for people who wanted to be notified once my book was published
  • Sending a special book publication announcement, including a limited-time discount code for $15 off the price of the PDF or paperback versions of my book.
  • Mentioning news about my book in the body of my newsletter
  • Including book testimonials and purchase links at the bottom of my newsletter

These steps built awareness and drove sales of my book.

Another email-related tip: Include a link to your book in your email signature. Here’s what mine looks like:

Susan's signature with book link


4. Create your virtual book tour

Unlike a traditional book tour, where the author must trudge from one brickandmortar bookstore to the next, a virtual book tour happens on the Internet, as the author makes guest appearance on different blogs to introduce your book to new audiences. If you make multiple appearances in a short period of time, it can create momentum for your book.

Here are the main steps for running your virtual book tour.

    1. Identify blogs read by members of your target audience. Find contact information and any guest post submission guidelines  provided by the blogger. Make notes about why you like each blog and what guest post topics might be appropriate. You’ll use this information when you contact the blogger. By the way, you should also mention on social media that you’re seeking hosts. I found a couple of good blogs that way.
    2. Write guest posts in advance. If you’re like me and can’t face spewing out a lot of blog posts at the last minute, then start stockpiling your guest posts in advance. This took pressure off me during my hectic book launch. I think my hosts appreciated that I proposed specific topics instead of burdening them with idea generation. Also, advance production allowed me to have most of my virtual book tour’s guest posts professionally proofread. I didn’t want embarrassing typos to mar my tour.
    3. Contact blogs about your virtual book tour. One to two months prior to my tour, I emailed my potential hosts. I explained the concept of a “virtual book tour” and suggested a guest post topic or blog post “reprint” for them. To entice them, I also mentioned that I’d publicize my guest appearances via my website and social media. In addition, I told them I’d  like them to include an image of my book cover, along with a bio containing a link to my book’s sales page.
    4. Give your hosts what they need. After a host says, “yes,” ask them what they need from you and by what date. I created a standard email reminding them of our target publication date–—I was trying to visit one blog/day for one month-—  along with a Microsoft Word file of my guest post with bio, book cover image, and my headshot photo, in case they could use that in addition to my book cover. I was surprised by how many of my hosts said I could send materials as little as a couple days ahead of the publication date. I tried to send the materials at least one week in advance, in case of problems.
    5. Publicize your guest posts. To maximize the reach of your book tour, share links to your guest posts via social media and other methods. If you tweet them it’s courteous to include your host’s Twitter name to improve their exposure. The same goes for other forms of social media that allow you to create clickable links to names. I also posted links to my virtual book tour on a virtual book tour page on my website, my blog, and in my e-newsletters.

5. Write and distribute press releases

I wrote two releases-—one was a standard “A new book is available” release, and the other was a tip sheet, “Top Tips for Creating Financial Blogs That Attract Clients.” I sent the first release to a select list of reporters, in addition to distributing it via PRWeb. I can’t attribute any positive results to these two releases. However, writing them helped me to clarify my thoughts about how to better discuss my book in other places. I imagine that I’d have achieved better results if I’d worked with a PR professional on distributing the releases and developing pitches for reporters. In fact, many months later, I’ve been much more successful in approaching reporters individually, with pitches tailored to them.

6. Use social media

Use all of your social media channels to inform people about your book, but don’t let your book overwhelm your social media updates. Following my book’s publication, I focused on letting people know about my limited-time $15 discount and linking to my virtual book tour posts, which demonstrated my ability to deliver content that helps financial professionals. I also continued to share other people’s content that I found interesting. I used HootSuite to schedule many of my promotional status updates. This helped me to space out my promotional content so it didn’t overwhelm.

7. Use your purchase confirmation emails

Your marketing shouldn’t end once you make your sale, especially not if you can send messages to your book buyers. While I can’t access the buyers of my paperback, the buyers of the PDF version receive an auto-generated confirmation email that I customized. I included click-to-tweet messages to share their purchases with their social media network. I’m also capturing emails for a book buyers email list that I’ll use rarely. So far, I’ve used it for one message that tells buyers about bonus content and asks them to review the book on Amazon and LinkedIn if they enjoyed it. (Alas, LinkedIn later eliminated the page where I collected book testimonials, as I described in this post about LinkedIn.)

8. Tap the power of Amazon

Don’t underestimate the power of Amazon, as I did initially. I’d thought that most of my book sales would come from people who already knew me and who’d click to buy the PDF version of my book through E-junkie or the paperback version. In fact, people quickly discovered me via Amazon. My book received its first review in a print publication thanks to an editor who searched on “blogging” on Amazon. Once my book’s introductory discount code expired, sales started shifting to Amazon.

An Amazon listing and reviews on Amazon carry clout. Justified or not, a book seems more legitimate when it’s listed on Amazon. Buyer reviews may make the difference between an individual’s browsing or buying.

Here’s what I suggest to take advantage of Amazon’s potential.

Here are the steps you can take to exploit Amazon.

  1.  Sell your book through Amazon. Luckily for me, the paperback version of my book was automatically made available through Amazon because I published it through CreateSpace, an Amazon company. Amazon provides instructions on how to sell your printed book through its website. It also offers instructions for Kindle e-books. Unfortunately, Amazon won’t sell books published in the PDF format.
  2. Inform readers how they can post reviews. It’s tacky—and a violation of your agreement with Amazon—to solicit phony positive reviews. However, you should let your fans know that they can post reviews on Amazon, even if they didn’t buy your book there. I believe the only requirement is that the reviewer be logged into an Amazon account from which they’ve made a purchase within a certain amount of time—I believe it’s 90 days.
  3. Set up your Amazon Author Page. Amazon offers you an Author Page, where you can provide information about yourself and publications that you’ve made available through Amazon. In most cases, this is information that you can enter at the time of publication. One exception: Amazon lets you load short excerpts from other people’s reviews of your book. As your book adds reviews, it’s worthwhile to expand this section until it is maxed out. To keep your page from becoming static, take advantage of the ability to send your blog posts and tweets to your page.

If someone contacts me with a positive comment after reading my book, I’ll ask that person to leave a review from Amazon. Aside from that, I don’t ask specific people for reviews.

9. Solicit book reviewsor other coverage

Book reviews sell books. I’ve noticed little spikes in my sales around the dates of book reviews, especially when Janet Mangano reviewed my book on the CFA Institute’s Enterprising Investor blog.

Your best bet is to target publications and websites that regularly run book reviews. They’ll be the easiest to interest in your book. I’ve used a twist on offering my book for review. I’ve asked, “Would you like to review my book or write about some of the tips in my book?” This broadens the range of publications that may highlight your book. You can also offer to let the publication run an excerpt from your book.

Try something that I’ve skipped

I haven’t used every means possible to promote my book. I’ve listed some of these methods below.

  • Book launch party or book signing–—try this if you have the budget and the means to gather a good group. I’ve also seen people run paid events with two prices, one for the event only and the other for the event plus the book.
  • Paid advertisementsI’ve heard of authors who’ve had some success using targeted Facebook ads. There are many options for you to consider.
  • Affiliate sales–—with affiliate sales, you pay a prearranged percentage of your sales price to the person whose affiliate link was the source of your sale. I’ve considered using this technique because E-junkie offers the capability to track such transactions. However, I haven’t done much with it yet. A twist on this technique is to sell through online marketplaces other than Amazon. Of course, they’ll also expect to receive a percentage of your sales as compensation.
  • Giveaways or contests—I’ve stayed away from these because I think they’re more trouble than they’re worth unless you run your giveaway or contest through a website that’s heavily trafficked by members of your target audience. It’s embarrassing to see a contest or giveaway with only a few people vying for the prize.
  • Events related to your book—podcasts, radio shows, talks, webinars and the like are all potentially powerful promotional techniques. People are more likely to buy once they’ve sampled your wares. At events unrelated to my book, I bring my book postcard to use instead of my business card. It’s a conversation starter.

Start planning now!

If you have a book in production, it’s not too soon to start planning your marketing campaign. Get started now!

Disclosure: If you click on an Amazon link in this post and then buy something, I will receive a small commission. I provide links to books only when I believe they have value for my readers.

Updated: October 2020

How to price your self-published book—lessons from my experience

How much should you charge for your self-published book? That’s one of the many questions I agonized over during the production of Financial Blogging: How to Write Powerful Posts That Attract Clients. In this blog post, I share suggestions from my experience. I don’t have all the answers, I don’t know if I priced my book correctly. However, I’ll give you food for thought.

1. Consider your costs

There are three sets of costs that you should consider in pricing your book. They include the costs of:

    1. Producing an electronic file of your book that’s ready for distribution—think about whether you need to recover the costs of writing, editing, formatting, and marketing your book. These can run thousands of dollars, as I discussed earlier.
    2. Producing each individual book—if you’re selling printed books, there’s a cost associated with printing each volume. You’ll also incur shipping costs if you sell from your personal stock. If you sell e-books, there are no printing or shipping costs.
    3. Selling through different distribution channels—I’ll illustrate the costs using my three channels.

Amazon is one of my three distribution channels. I earn the least when I sell paperbacks through Amazon, which is why I priced my paperback higher than the PDF. Amazon pays royalties of 60%, according to this explanation of royalties on its Kindle Direct Publishing unit’s website. It also deducts a fee for the cost of producing each paperback through its Kindle Direct Publishing subsidiary. I fare a little better if you make your Amazon purchase through my Amazon affiliate link because I’ll earn a small commission on your purchase.

The fees associated with my book’s PDF version differ from the paperback. I pay a monthly $5 fee to E-junkie, the provider of my online shopping cart. I also incur PayPal fees of about 3% on each transaction.

2. Think about why you’re publishing 

Your reasons for publishing a book should influence your pricing. Why did you write a book? If you’ve written a book with best–seller potential, with the goal of boosting your already-hefty speaking or consulting fees, you’ll probably price your book low. Selling lots of books—and generating buzz about your expertise—will enhance the demand for your services. On a related note, I’ve seen people like Guy Kawasaki, the author of APE: Author, Publisher, Entrepreneur-How to Publish a Book, offer limited-time free giveaways of their e-books. Tactics like this may also boost a book’s sales ranking in its Amazon category, which can help it attract more buyers.

If you’d like to maximize your income from your book, it’s not as easy to suggest what part of the price spectrum your book should target. To oversimplify, would you rather sell one book at a price of $300 or 1,000 books at a price of $3 apiece?

3. Consider your genre and format

Your book’s genre and format matter. If I’d published a novel in the Kindle format, I probably would have priced it at $2.99. That seemed to be the going rate for Kindle novels.

To provide context for your pricing decision, look at how comparable books are priced. It’s easy to do research on Amazon. As a point of reference, textbooks with limited print runs can run $40-$100. That range became a touchstone for me.

4. Consider your book’s value to readers

I struggled with this point. My book captured all of the content in the original version of my five-lesson class for financial advisors, “How to Write Blog Posts People Will Read”—a class that advisors had paid as much as $1100 to take. In fact, the book offered additional content, too. I really wanted to price the book relative to my class. After all, I would sacrifice teaching income once the book took the place of the class. (Yes, I know I still offer a class, but it took me a while to figure out how to enhance the content beyond what’s in my book.)

I spoke with some consultants who’ve sold so-called “information products” to advisors. They thought that I could succeed with a volume priced around$200 and sold from a web page emphasizing the book’s practical worksheets and checklists. That was mighty tempting.

However, I received a shock when I implemented this blog post’s fifth suggestion.

5. Ask your potential readers

I’m a big fan of crowdsourcing by asking my colleagues, friends, and followers for advice. I sent some emails asking, “How much would you be willing to pay for this book?” Folks came back to me with a range of $9.99-$39. One noted that Technology Tools for Today’s High-Margin Practice: How Client-Centered Financial Advisors Can Cut Paperwork, Overhead, and Wasted Hours sold well with a list price of $60, although the hardcover was discounted to $39.01 on Amazon when I checked.

I was struck by a friend’s comment that advisors won’t think about the cost of your class when they see your book’s price. If you price it at $199, they’ll just suffer from sticker shock, he said. This was a valuable reality check for me. However, I also remembered what I’d learned in a class taught by small business coach Karyn Greenstreet. People tend to understate how much they’ll pay for your products and services.

6. Pick a price, any price

I ultimately priced my book at $39 for the PDF and $49 for the print-on-demand paperback. For the first month after publication, I provided a discount code for $15 off the list price on the PDF or paperback.

While I agonized over the price, I took comfort in my friends’ advice. They said, if your pricing doesn’t work, you can change it, so don’t worry!

Did I make the right decision?

My biggest fear was that no one would buy my book. I was relieved when the first few books sold. I was excited when my sales broke into double digits and then exceeded 100 volumes.

Ultimately, I’m glad that I’ve given my book a broader audience by skipping a three-digit price in favor of a more accessible, but still premium price.

If you’d like to learn more about my adventures in self-publishing my book, check out the following posts:

Good luck with your pricing decisions!

Disclosure: If you click on an Amazon link in this post and then buy something, I will receive a small commission. I only link to books in which I find some value for my blog’s readers. I am also in the process of becoming an E-junkie affiliate because it’s a service that I use successfully.

NOTE: This post was updated on June 11, 2021.

Content strategy and someone like you

How can you keep the attention of your audience? That’s a big concern for anyone publishing anything these days.

The following sentence caught my eye in The Content Strategy Take Back to Work Toolkit in a Northwestern University class that I took on Coursera:

In order to hold the attention and interest of an audience, the writer needs to speak in a voice the audience will recognize as someone like them.

Wow! That’s a vote for writing in the voice of a human being rather than an institution, unless you’re an institution trying to appeal to other institutions. I think this is an important lesson for financial services organizations to remember when communicating with individuals.

Still, I’m not convinced that statement is always correct. After all, even if I’m a casual, relaxed individual, would I want the doctor treating me for a serious illness to write in a casual, relaxed style? Formality and gravity might appeal more to me.

Someone like you?

What about you? Do you prefer content in which the writer appears to be someone like you? I’m interested in your thoughts.


Note: In 2020 I removed the broken link to the Northwestern University class that I had taken on Coursera.

Focus on readers with “The Language of Trust”

The Language of Trust tells you why and how you can sell more effectively by focusing on your buyers. The following statement stuck with me:

The first rule of building trust is to accept the fact that selling a product or idea has little to do with your company, what you’re offering, or your ideas. It has everything to do with your audience and what they believe, think, and want.

This is an important lesson and the reason why I urge my clients to talk about “you,” the reader, instead of “we,” the firm.

I believe financial advisors will find this book especially appealing because the authors use many examples from the worlds of financial planning and investments.

Don’t sabotage your website’s news page

In the News page

Click to see my news page with items listed in the correct, reverse-chronological order

A news page featuring your firm’s mentions in the media can boost your credibility, as long as you avoid one financial advisor’s mistake.

“Wow! This advisor hasn’t gotten any press since 2006.” That was my first thought when I looked at this advisor’s news page earlier this year. I immediately thought, “He should delete his news page.”

But then I scanned the rest of the page. I realized that the advisor had listed his media coverage in chronological order. He started in 2006 and continued up to the present day way, way down the page.

Unfortunately, most readers won’t scan the entire page. They’ll stop with the misperception that the advisor is a dud at getting the attention of the press.

The lesson for you? List your news coverage in reverse chronological order, putting the most recent items at the top of your page. For an example, see my “In the News” page.

Using the proper order is a small step with a big impact.

4 e-newsletter landing page tips from “Epic Content Marketing”

“10 Ways to optimize your e-newsletter landing page” is one tiny but useful section of Joe Pulizzi’s Epic Content Marketing. It’s important to craft your landing page—the newsletter’s signup page—effectively because, as Pulizzi writes, “your email database is a significant business asset.” Your email list is valuable because you control it in a way you can’t control social media connections.

Here are some tips from Pulizzi that will help you attract more people to your e-newsletter list because you convey the benefits of your content and make your signup easy to navigate.

Tip 1. Describe newsletter benefits

Explain how your prospect will benefit from subscribing to your newsletter, as Pulizzi suggests. For example, say how it’ll help them achieve financial peace of mind or otherwise improve their lives.

The benefits needn’t be limited to how your newsletter articles help readers. You can also offer a special report as an enticement for readers. That’s what I do with Investment Writing Top Tips.

Sharing testimonials or awards for your newsletter, another Pulizzi tip, also reinforces your newsletter’s benefits for the reader.

Tip 2. Make your landing page layout effective

Make it easy for readers to find your signup form on the page. This is why it’s important to “bring the signup above the fold,” as Pulizzi suggests, so it is visible without the reader scrolling down the page. You can view my newsletter signup page for an example of positioning.

Pulizzi also suggests that your signup should “include a button that says ‘subscribe’ or ‘sign up’ (not submit),” taking advantage of words with positive connotations.

Put less important information farther down the page. This includes a privacy statement, which is still essential. Pulizzi also suggests that you tell subscribers “what you will and won’t do with their information. This can go bottom of your page,” says Pulizzi.

Another design tip is to rid your newsletter page of anything that might distract the reader from signing up, says Pulizzi.

Tip 3. Show readers what they’ll getNov 2013 newsletter page 1

Pulizzi suggests that you show readers a picture of your newsletter. I think he means a small image of your newsletter’s first page (see example of my newsletter on the right) or maybe just a table of contents.

Also, link to a sample newsletter. Until recently, I’ve handled this by providing an archive of my monthly newsletters, instead of one sample that I’d need to update periodically.

Tip 4. Limit your newsletter sign-up form’s fields

Limit the number of fields in your newsletter sign-up form. As Pulizzi says, “ the fewer fields, the more likely prospects will be to sign up.”

When I started my newsletter I required only two fields, first name and email address. Now that I’m more confident of my newsletter’s appeal, I request, but don’t require, last names and company names.

Pulizzi’s book as a content marketing resource

If you’re new to content marketing, Epic Content Marketing offers a great overview of content marketing’s many components. It suggests steps that the reader can take to launch their content marketing strategy and manage their content process. There’s information for more experienced marketers too. I noticed some items for action, such as checking out the persona creation tool at upcloseandpersona.com. I’d also like to take a more analytical look at my content strategy.

As a writer, I noticed that some of the writing isn’t as tight as I’d like. For example, information that’s presented as a series of nine bullets screams for a rewrite. Too many bullet points exhaust the reader.

On balance, I enjoyed the book because it made me think.

Disclosures: I received a free copy of this book from McGraw Hill in return for agreeing to mention it in my blog. If you click on the Amazon link in this post and then buy something, I will receive a small commission. I only link to books in which I find some value for my blog’s readers.

“Avoiding the Rush Hour”—Insights from an investment marketer

If you’re an investment marketer, you’ve struggled with last-minute rush projects. That’s why I’m delighted to have Cari Cardaci share five tips for “Avoiding the Rush Hour,” which she honed working as a marketing manager for global and U.S. institutional marketing teams and processes. I like her ideas about setting priorities and procedures before your marketing team gets overwhelmed.

Cari and I connected through May 2013 PAICR RFP Symposium, where we both presented. PAICR is an organization of investment communications professionals.

Avoiding the Rush Hour

By Cari Cardaci

Every investment marketer has experienced the last-minute request, the tight turnaround time, the “drop everything and complete this by the end of the day” project. These stressful scenarios are not optimal, but often become the norm rather than the exception. So how do marketers address this challenge and “avoid the rush hour”?
Frankly, I do not believe that marketers will ever be able to eliminate all last-minute requests, as clients, consultants and prospects have a history of requiring quick turnaround times. And sometimes, our colleagues hold on to requests a wee bit too long! However, there are proactive measures Marketing can take to better handle these situations.

1. Strategize with distribution colleagues

On at least an annual basis, proactively meet with sales and consultant relations management to determine priorities for the coming six months to one year. Identify a focus product list, determine consultant database coverage, and identify in-scope and importantly, out-of-scope products and projects. Proactive planning is essential to efficiently allocate marketing resources to priorities, manage expectations, and align objectives.

2. Promote and support standardization

Standardization of content and data is essential for responding to requests in a timely manner. Avoid developing customized materials that duplicate messages and data. Know how to leverage existing materials to respond to one-off requests. Many firms utilize service level agreements for clients. Adopt a similar strategy within Marketing, based on product priority or assets/revenue minimums. Consider providing standard materials to requests that fall below stated minimums.

3. Understand firm and product data

One-off data requests are perhaps the most difficult to deliver in a timely manner. Obtaining non-standard performance, assets, and statistics can be arduous. This is often an exercise in futility.

It is important to:
•    have approved sources of data;
•    understand what data is relevant for each product, and;
•    know what data can be provided quickly, what will take time, and what data is simply not possible to obtain.
This knowledge can save a lot of time, energy, and frustration.

4. Define a workflow process

Often, a sales person or product specialist will have a favorite contact within the Marketing team, and will repeatedly ask that person for favors. This arrangement is unsustainable for obvious reasons.

The marketing manager should always be the point of contact for all marketing requests. The manager can then delegate work based on capacity and expertise and even push back on the request when necessary.

5. Obtain senior management support

Perhaps the most important factor is to proactively garner senior management support. Best-case scenario is that Marketing has a “seat at the table” and has developed a mutually beneficial and respectful relationship with their colleagues. Proactive, knowledgeable marketing professionals (rather than a reactive, rushed team) offer the most value to a firm for the long term.

Cari Cardaci has held various senior institutional and retail marketing positions, most recently with HSBC Global Asset Management, Western Asset Management, Citigroup Asset Management, BlackRock and Bankers Trust.


Asking reporters to send questions in advance

Working with reporters is easier and more productive when you understand how they work. You can ask reporters to send you questions before an interview. However, please don’t insist they do so, unless you want to sacrifice your opportunities.

Many reporters refuse to send questions in advance. They fear it’ll destroy your spontaneity. Plus, they don’t want to limit the scope of their interviews to those questions. This works to your advantage when they dig deeper into interesting points that you raise during your conversation.

If a reporter declines to provide questions in advance, you can still ask them to expand briefly on the scope of an interview request before you agree to speak.

After all, a topic of “401(k) plans” is too broad to allow you to do any preparation, or even to assess whether you’re a good fit for the reporter’s topic. If you’re an expert on, say, using your 401(k) for real estate investment, it’s fair to ask if that’s on the reporter’s agenda. You might also ask, “Are there statistics or background information that I can find for you?”


Note: This post was updated in December 2022 and was originally published in 2014.