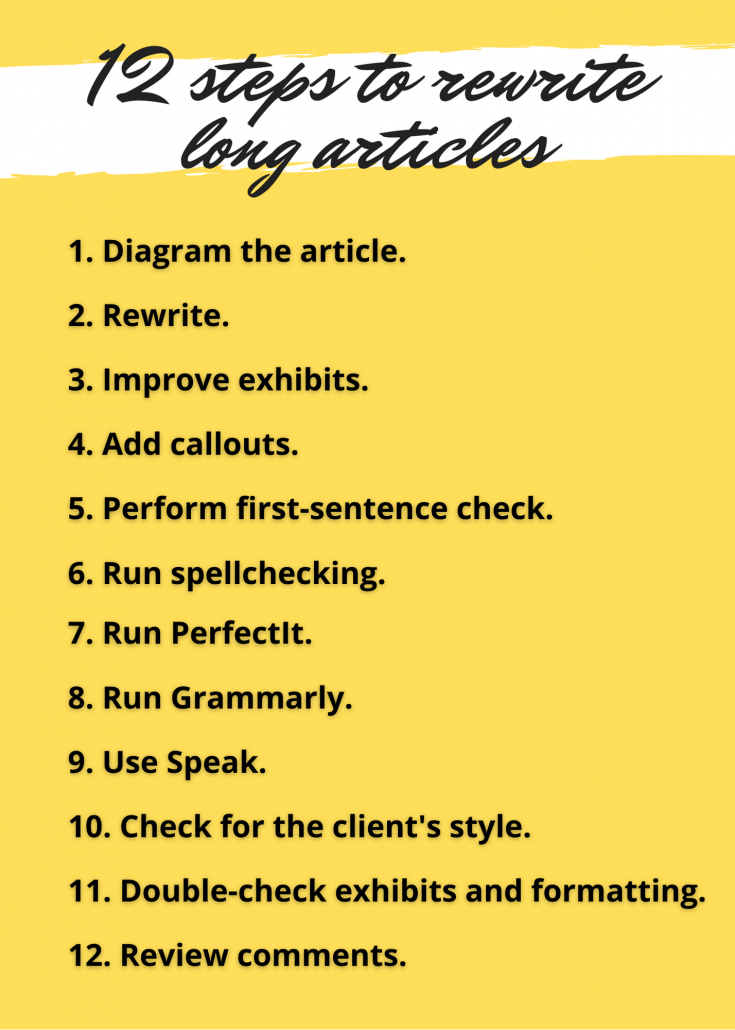
What’s the best process to rewrite long articles written by someone other than you? You may get some ideas from my 12-step process. I start by assessing the article’s strengths and weaknesses. Next, I rewrite the article, including its graphs, callouts, and anything else that isn’t part of the main text. Finally, I run several checks on the document. You can rewrite long articles with confidence if you follow this process.
1. Diagram the article
When clients ask me to rewrite long articles, sometimes they’ll point out the problems they’d like me to address. But, more often, they’ll simply ask me to tighten up and improve the document. I need to quickly get a sense of what the article says, and whether its overall structure works. Mind mapping helps me with this.
I use mind mapping to diagram the current structure and main points of the article. I put the article’s topic in a circle in the middle of the page, then draw a line from that circle for each section. From each “section line” I draw more lines—typically one for every paragraph. I then add as many details on separate lines as I feel are important for me to understand the article.
As I go through, I also note text that will need more work, poorly placed or designed exhibits, and anything else that will need work during the rewriting process. I might mark this on a printed copy of the article.
Next, I look at the mind map to grasp the article’s main points. This high-level view also helps me to spot missing or poorly arranged information, as I explained in “Mind maps: can they win buy-in for your writing?”
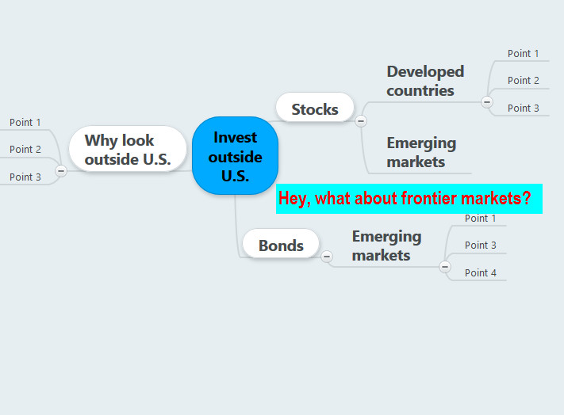
Here’s a mind map that suggests the need to add a new topic—frontier markets—to a paper about investing outside the U.S. I discuss it in more detail in “Mind maps: can they win buy-in for your writing?”
After mind mapping, I often write bullet points that say in my own language what I see as the article’s main points. I’ll typically bounce these off the client to get confirmation. However, busy clients—especially those who aren’t the subject-matter experts—often leave me on my own.
2. Rewrite your long article
I start rewriting by editing the introduction to ensure that it introduces the article’s important themes. I believe in giving away the main points in the article’s beginning. I feel this prepares the reader’s mind to accept the arguments that follow. I repeat this process at the start of each major section of the article. Sometimes I’ll have jotted down new introductory sentences for the sections while I was diagramming the article. That means I only need to adapt the sentence to work in its new home.
At the top of every paragraph, I check that the initial sentence gives the main point or topic of the rest of the paragraph. That way, I know that later the article will pass my first-sentence check.
I also work to simplify and clarify every sentence. My goal is to make the article as reader-friendly as possible. Wherever possible, I cut text that’s redundant or irrelevant.
During this phase, I use Microsoft Word’s comments feature to ask questions and make suggestions.
3. Improve graphs and other exhibits
Graphs and other exhibits can boost the power of your writing. But their significance often isn’t immediately obvious to your readers.
I like the approach that some of my clients take. They give the exhibit a short title, as most folks do. But they also add a caption that explains the exhibit’s meaning. I create or check captions so they’re easy to understand—or, at least as easy as a complex graphic can be.
I also check that the exhibit is located as close as possible to the text to which it refers.
4. Add callouts
Sometimes clients ask me to add callouts or pull quotes to engage people who skim their articles. Callouts are blocks of text—often quotes from the article—that are highlighted by their design or location. Similar to movie trailers, “They show just enough of the best stuff to get the reader to buy a ticket for the full show,” says Ann Wylie of Wylie Communications.
Callouts add visual interest. They can also help your designer avoid awkward page breaks by filling space that would otherwise go empty. That’s important when I’m filling one of my other roles, as the editor of a monthly print magazine. When you rewrite long articles to include callouts, you make it more likely that readers will read the entire piece—or at least skim it.
5. Perform first-sentence check
When your reader can grasp the gist of your argument by reading the first sentence of every paragraph, you’ve passed my first-sentence check.
I explain the details in “Quick check for writers, with an economic commentary example.” I also explain what to do when your article fails this test.
6. Run spellchecking software
Running spellchecking software may help you catch obvious errors. Still, the software isn’t infallible, as shown by the example of the “portfolio manger”—instead of “manager”—in an investment firm’s pitch book. That’s why I use other software tools, too.
7. Run PerfectIt
PerfectIt is software that’s particularly good at finding problems of inconsistent usage. For example, did you hyphenate a term in one place but not another? Or, did you refer to a financial planner as both an “advisor” and an “adviser”? Of course, human judgment is required because sometimes such inconsistent usage is correct.
I’ve written about PerfectIt in “My three main software tools for proofreading.”
8. Run Grammarly
I use Grammarly grammar-checking software, which checks different issues than PerfectIt. However, like PerfectIt, it also incorrectly flags some usages as wrong. Ultimately, it finds enough errors that I continue to use it when time permits. I find it good at identifying missing articles and unnecessary words.
9. Use Speak
I use Speak, Microsoft Word’s text-to-voice function to read an article paragraph by paragraph. As I explained in an earlier post about my use of a text-to-voice function, when you read only with your eyes, “you naturally fill in missing words and correct other mistakes in your mind.”
10. Check for the client’s style
When a client’s style guide calls for a style that I don’t typically use, I try to check on any major differences. For example, I love the serial comma, but not all of my clients do. Or, they may spell out “percent” while I’m accustomed to using a percentage sign. These differences are easy to check using Word’s search function.
11. Double-check exhibits and formatting
I scan exhibits to see if they have all of the necessary elements, such as a title and a source line. I also check the article’s formatting, especially to make sure that the hierarchy of headings is correct.
12. Review comments
I check that my comments using Microsoft Word’s Comments feature are reasonably easy to understand.
Hit “send” with confidence!
After completing step #12, I’m ready to send the revised text to my client.
If you follow my process, you can feel more confident that you’ve caught errors and improved the document that you’ve rewritten.